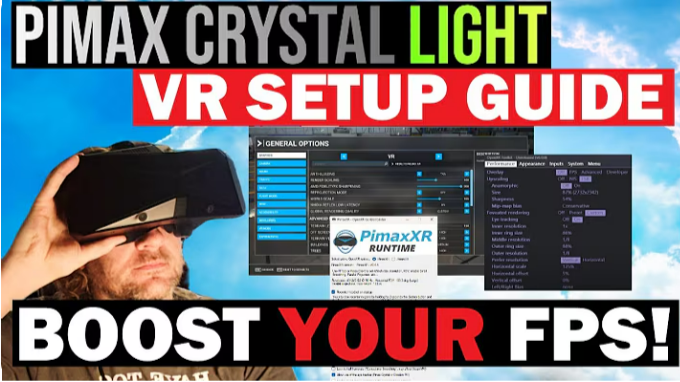
Hey fellow VR pilots! 🚀
If you're like me and love experiencing Microsoft Flight Simulator 2024 in VR, you know that finding the right balance between stunning visuals and smooth performance can be a real challenge. Well, I’ve found a combination that works like magic: Pimax Crystal and Auto FPS, and I’m here to share the settings and tips that made a huge difference for me.
What’s the Magic Combo?
Here’s the deal: I’ve been running MSFS 2024 on a Pimax Crystal paired with a 4070 Ti Super GPU using Auto FPS, a free software tool that dynamically adjusts your simulation’s graphical settings to hit a target frame rate. It's a game-changer for VR!
Why does it matter? VR can be very demanding on your system, especially when you’re running highly detailed simulations like MSFS 2024. With Auto FPS, your system dynamically adjusts graphical parameters (like terrain details, object quality, etc.) to maintain your target FPS, so you get smoother performance without compromising too much on quality.
My Setup & Settings
To keep things realistic, I’m using a 4070 Ti Super system that’s under £2,000 (great value if you’re not ready to drop on the latest 4090 or 5090 GPUs). Here’s how I’ve fine-tuned my setup for the best performance and visual experience:
-
Resolution & Scaling:
-
Set to 3500 x 4142 in TAA (Temporal Anti-Aliasing) mode for that sweet spot between clarity and performance.
-
I found this gave me stable performance without sacrificing too much visual quality, especially in VR.
-
-
Target FPS:
-
My target FPS is set to 40 FPS, which is a balanced target.
-
When not recording, I often hit around 45 FPS (which is awesome for smooth VR).
-
-
Using Auto FPS:
-
Auto FPS automatically adjusts graphical settings to keep me near my FPS target, even as I fly low and fast (like over Switzerland in the L39).
-
It’s crucial because recording VR footage while flying makes it extra demanding on the GPU, and Auto FPS ensures I get those smooth, consistent frames.
-
Key Features of Auto FPS That Made the Difference:
-
Smaller T-LOD (Terrain Level of Detail): The closer I get to my target FPS, the more detailed the terrain becomes—ensuring a smooth, beautiful flight experience.
-
VFR & IFR Settings: Whether you're flying visually or in instrument conditions, Auto FPS adapts to provide stable performance.
-
Expert Mode for Fine-Tuning: The best part is, you can go deeper into the settings and adjust things manually if you need more control over your system’s performance.
Graphics Settings for MSFS (VR Mode)
General Settings
-
Render Scaling: 100% (Adjust lower if performance drops, e.g., 90% for 3070 users)
-
TAA (Anti-Aliasing): Enabled (Best for clarity in VR)
-
Terrain Level of Detail (T-LOD): 100-150 (Lower if flying in dense areas)
-
Object Level of Detail (O-LOD): 80-100
-
Volumetric Clouds: Medium or High (Depends on your GPU power)
-
Texture Resolution: High
-
Texture Filtering: Anisotropic 8x
-
Buildings: Medium
-
Trees: High
-
Grass and Bushes: Medium
Lighting and Effects
-
Shadow Maps: 1024
-
Contact Shadows: Low
-
Ambient Occlusion: Medium
-
Reflections: Low
-
Light Shafts: Medium
Post-Processing
-
Depth of Field: Off
-
Motion Blur: Off (for a crisp view in VR)
-
Bloom: On
-
Lens Flare: On
VR-Specific Settings
-
Field of View (FOV): Wide for immersion (Pimax excels here)
-
IPD (Interpupillary Distance): Set manually in Pimax Crystal for your eyes
-
Resolution: 3500 x 4142 (Adjust based on your GPU's capability)
The Game-Changer: Auto FPS
If you haven’t tried Auto FPS yet, you’re missing out. Here’s why it’s essential for VR:
-
Dynamically adjusts settings based on your FPS target: Auto FPS lowers or increases the graphical fidelity (like terrain detail and object complexity) to stay within the frame rate you set.
-
Works perfectly with both MSFS 2020 & 2024: The tool auto-detects the version you’re running and applies the correct adjustments.
-
Improves performance without needing top-tier hardware: With this tool, I can get smooth VR at 45 FPS even on a mid-range system (like the 4070 Ti Super), something that would’ve been impossible without Auto FPS.
Auto FPS Settings
-
FPS Target: 40-45 (For consistent smoothness)
-
VFR Flight Mode (Visual Flight Rules): Enabled for high-detail low-altitude flights
-
IFR Flight Mode (Instrument Flight Rules): Lower detail for high-altitude flights
-
Dynamic Adjustments: Enabled (Let Auto FPS handle terrain detail in real-time)

NVIDIA Control Panel Tweaks
-
Power Management Mode: Prefer Maximum Performance
-
Texture Filtering - Quality: High Performance
-
Threaded Optimization: On
-
Vertical Sync: Use Fast
Pimax Crystal: The Perfect VR Headset for Flight Sim Enthusiasts
Now let’s talk about Pimax Crystal. This headset is built for flight sims and other high-demand VR experiences. Here's what makes it stand out:
-
Ultra-wide FOV: With the Pimax Crystal, you’re getting a much wider field of view than most VR headsets, which is great for immersion—especially in flight sims.
-
Super Crisp Visuals: The clarity you get with Pimax is exceptional, and when paired with Auto FPS, you get a seamless VR experience.
-
Comfort & Performance: Even with extended use, the Pimax Crystal provides great comfort, and the visuals stay sharp and consistent.
Pimax Crystal Settings
-
Refresh Rate: Set to 90Hz (for balance between clarity and smoothness)
-
Render Quality: High
-
Grade:Performance


🎮 Why Join Our VR Community? 🎮
🌟 Helpful Tutorials: Explore expert guides tailored for VR game enthusiasts—level up your experience!
🎁 Exclusive Rewards: Grab VIP coupons and free accessories available ONLY in our Facebook Group.
📢 Stay Tuned: Be the first to know about official events and breaking news from the VR frontier.
🙌 Join the Fun: Connect with fellow VR fans and share your passion.
👉 Don’t miss out !!! Join Now 🎉


